New day. Closed Blender, Windows 7 update and reboot, today the file works properly, Avastar can export with no problems.. I will keep you updated!
Thursday, October 16, 2014
Wednesday, October 15, 2014
Avastar adventures
First of all, I must say Eleanora Newell is great, as she is so fast at answering and helping with Avastar.
This is what she said on http://blog.machinimatrix.org/workflows/classic-fitted-tips/ , where you find useful tips, tutorials and a blog about how to use Avastar.
Hi, Delia,
I need a picture showing me your shoes in object mode and on the right, I need to see the property shelf (toggles letter P) showing me the scale and rotations transforms for the shoes, please. Remember that I told you that if the shoes had incorrect scale (especially in the negative), it would cause reversed normals. In addition, if the scale is incorrect, you must then check the normals again after you correct it and make sure the normals don’t need to be corrected, because often they do. And again, this is NOT something Avastar does, this is all about the models and how you model, which includes if you keep correct scale and check for inversions throughout the modeling process.
Actually I had forgotten scaling is important, as this solved another issue I had had and Eleanora had told that to me already. In that case the problem was fixed, but this seems to be a more tricky one.
Here is what I did:
1 .
 scaled, as you can see on the right. CTRL+A

flipped normals and exported as in the picture I posted yesterday , dae - Avastar
 Reimported them in Blender to see if everything was ok. Nope, flipped normals.
Checked if it is my problem or Avastar problem, exporting the same file using Blender- dae
 Reimported the dae file.
 Perfect.
So, as I am sure Avastar works and was tested, and I know I am soneone who can find bugs anywhere, I can think of the following reasons:
a- the program is so perfect that it fixes things which are not ok, so it interprets the lack of inner faces as something not ok and flips normals. Blender export does not do that, so it must be some extra line in exporting and checking.
b- there is some problem with vertex groups ( I added some for color stripes etc) , or in interpreting the weights taken from Slink feet . ( I set the file as expained in the tutorial ). I exported as avastar .dae Slink feet for a check, and the file has no ending, I have to add .dae manually to be able to read it. ( see the picture in my previous posts)
c. There is some problem with texture, as I noticed before ( in Blender export for sl, not Avastar ) that it could give some problems when exporting it, so Texture might be an issue. No clue.
This is what she said on http://blog.machinimatrix.org/workflows/classic-fitted-tips/ , where you find useful tips, tutorials and a blog about how to use Avastar.
Hi, Delia,
I need a picture showing me your shoes in object mode and on the right, I need to see the property shelf (toggles letter P) showing me the scale and rotations transforms for the shoes, please. Remember that I told you that if the shoes had incorrect scale (especially in the negative), it would cause reversed normals. In addition, if the scale is incorrect, you must then check the normals again after you correct it and make sure the normals don’t need to be corrected, because often they do. And again, this is NOT something Avastar does, this is all about the models and how you model, which includes if you keep correct scale and check for inversions throughout the modeling process.
Actually I had forgotten scaling is important, as this solved another issue I had had and Eleanora had told that to me already. In that case the problem was fixed, but this seems to be a more tricky one.
Here is what I did:
1 .
flipped normals and exported as in the picture I posted yesterday , dae - Avastar
Checked if it is my problem or Avastar problem, exporting the same file using Blender- dae
So, as I am sure Avastar works and was tested, and I know I am soneone who can find bugs anywhere, I can think of the following reasons:
a- the program is so perfect that it fixes things which are not ok, so it interprets the lack of inner faces as something not ok and flips normals. Blender export does not do that, so it must be some extra line in exporting and checking.
b- there is some problem with vertex groups ( I added some for color stripes etc) , or in interpreting the weights taken from Slink feet . ( I set the file as expained in the tutorial ). I exported as avastar .dae Slink feet for a check, and the file has no ending, I have to add .dae manually to be able to read it. ( see the picture in my previous posts)
c. There is some problem with texture, as I noticed before ( in Blender export for sl, not Avastar ) that it could give some problems when exporting it, so Texture might be an issue. No clue.
Tuesday, October 14, 2014
Struggling with Avastar 1.2
Trying again. I prepared again the Slink feet as explained in here http://blog.machinimatrix.org/workflows/classic-fitted-tips/ , appended my shoes again, removed skeleton and weights , applied them again, here is the result
Found what was wrong: never apply weights from Slink if your shoes still have a mirror modifier not applied, this will be the result. Weights from mirror to mirror cannot be changed, at least not in this case.
 and of course checked normals again
 So I finally found a solution.
Export Avastar dae.
Find the file with no ending .
add .dae manually
reimport it to Blender, you will see normals flipped
Flip normals
Export it to .dae using blender export
Found what was wrong: never apply weights from Slink if your shoes still have a mirror modifier not applied, this will be the result. Weights from mirror to mirror cannot be changed, at least not in this case.
Export Avastar dae.
Find the file with no ending .
add .dae manually
reimport it to Blender, you will see normals flipped
Flip normals
Export it to .dae using blender export
Monday, October 13, 2014
Struggling with Avastar
Hi everyone,
I have been struggling for a month or so now, trying to create some shoes. Apparently I can save and upload them properly using Blender save, but not Avastar, as it flips normals. Any clues?
See the pictures below.
 Here is my file, proper normals
 My file loaded as Blender file, after saving ( but no weights), in red, and in white, as Avastar weighted
 This is how it appears when saved with Avastar dae, and sometimes the file is not even saved,

 this is how I save.
I guess there is something in my file which makes the program crazy, no idea what it is .
I have been struggling for a month or so now, trying to create some shoes. Apparently I can save and upload them properly using Blender save, but not Avastar, as it flips normals. Any clues?
See the pictures below.
I guess there is something in my file which makes the program crazy, no idea what it is .
Monday, May 26, 2014


Sunday, March 30, 2014
Avastar 1039 workflow
by Eleanora Newell
▀▀▀▀▀▀▀▀▀▀▀▀ ▀ ▀ ▀ ▀ ▀ ▀ ▀ ▀ ▀ ▀▀▀▀▀▀▀▀▀▀▀▀
Installation of Avastar test version 1-1-1039.
We have found that you will need to:
1. Install the zip addon.
2. In the addon tab, type Avastar into the search field.
3. Verify that Avastar is enabled.
4. Save user settings.
5. Restart Blender.
6. If you are in Blender 2.7x, the Add menu is now at
the bottom of the 3D View window. The shortcut is
Shift-A.
If it is stubborn, uninstall Avastar and restart Blender
before proceeding with the steps..
Still stubborn, Set to Factory setting, uninstall Avastar
and proceed with the steps.
▀▀▀▀▀▀▀▀▀▀▀▀▀▀▀▀▀▀▀▀▀▀▀▀▀▀▀▀▀▀▀▀▀▀▀▀▀
Please note that this is for Avastar test version 1-1-1039
and is likely to change with future updates! 1039 fixed a
bug found in 1038.
▀▀▀▀▀▀▀▀▀▀▀▀▀▀▀▀▀▀▀▀▀▀▀▀▀▀▀▀▀▀▀▀▀▀▀▀▀
● Workflow for previously weighted mesh:
1. Have your mesh and the avastar figure and rig ready (I like the meshes and rig on different layers for ease of selection, you can use shift select to add more than one layer, but you can put them as you like).
✱ NOTE: It is important to model over the default shape. Once the model is complete and parented to the rig, with sliders attached, you can load the shape you wanted to use. If you did the five standard sizes, hopefully you also included default. If not, take the one closest to default size and edit it to the default shape. ✱
2. Select your mesh and the rig. In the Skinning and Rigging panel, set Weight to "Keep". Shape sliders should be on by default.
3. Press the Assign Armature button. This changes the options for the next step. At this point both your mesh and rig are still selected and can stay selected for the next steps.
4. For Fitted Mesh, press the plus sign by "Deform (Fitted)..." to open the panel where the Fitted button should be the one enabled.
5. The deform panel has been updated to try and make it as simple as possible. Since we are doing a garment that was previously weighted, change Weight to Move. This will move the weights that were originally mBones (SL) weights and moves them to the corresponding cBones (volume/collision). If you want your mesh to also have weights place on the cBones for which there are not corresponding mBones, checkmark the Generate Weights button. Apply configuration.
6. The mesh is now ready for you to test with sliders. Go to the object properties to test the sliders.
7. Go to Show bones in the Avastar tab and enable weight. This will make the sl base (blue) and volume bones (orange octahedrons) visible and put you in the weight room.
8. Enabling Stick will make the SL base bones easier to work with.
9. Use the SL bones to pose, and the volume cbones to weight.
10. To update the weights while you're painting, press alt-q to see changes to the mesh after you paint weight.
▀▀▀▀▀▀▀▀▀▀▀▀▀▀▀▀▀▀▀▀▀▀▀▀▀▀▀▀▀▀▀▀▀▀▀▀▀
● For unweighted mesh:
1. Have your mesh and the avastar figure and rig ready (I like the meshes and rig on different layers for ease of selection, you can use shift select to add more than one layer, but you can put them as you like).
✱ NOTE: It is important to model over the default shape. Once the model is complete and parented to the rig, with sliders attached, you can load the shape you wanted to use. If you did the five standard sizes, hopefully you also included default. If not, take the one closest to default size and edit it to the default shape. ✱
2. Select your mesh and the rig. In the Skinning and Rigging panel, set Weight to Meshes, Bones or Empty, depending on what you want weight from. Remember that to use Meshes means you must have the avastar, or another mesh with weights, visible for the copying to occur. Shape sliders should be on by default.
3. Press the Assign Armature button. This changes the options for the next step. At this point both your mesh and rig are still selected and can stay selected for the next steps.
4. For Fitted Mesh, press the plus sign by "Deform (Fitted)..." to open the panel where the Fitted button should be the one enabled.
5. The deform panel has been updated to try and make it as simple as possible. Since we are doing a garment that was previously weighted, change Weight to Move. This will move the weights that were originally mBones (SL) weights and moves them to the corresponding cBones (volume/collision). If you want your mesh to also have weights place on the cBones for which there are not corresponding mBones, checkmark the Generate Weights button. Apply configuration.
6. The mesh is now ready for you to test with sliders. Go to the object properties to test the sliders.
7. Go to Show bones in the Avastar tab and enable weight. This will make the sl base (blue) and volume bones (orange octahedrons) visible and put you in the weight room.
8. Enabling Stick will make the SL base bones easier to work with.
9. Use the SL bones to pose, and the volume cbones to weight.
10. To update the weights while you're painting, press alt-q to see changes to the mesh after you paint weight.
▀▀▀▀▀▀▀▀▀▀▀▀▀▀▀▀▀▀▀▀▀▀▀▀▀▀▀▀▀▀▀▀▀▀▀▀▀
1. Have your mesh and the avastar figure and rig ready (I like the meshes and rig on different layers for ease of selection, you can use shift select to add more than one layer, but you can put them as you like).
✱ NOTE: It is important to model over the default shape. Once the model is complete and parented to the rig, with sliders attached, you can load the shape you wanted to use. If you did the five standard sizes, hopefully you also included default. If not, take the one closest to default size and edit it to the default shape. ✱
2. Select your mesh and the rig. In the Skinning and Rigging panel, set Weight to Meshes. Remember that to use Meshes means you must have the avastar, or another mesh with weights, visible for the copying to occur. Shape sliders should be on by default.
3. Press the Assign Armature button. This changes the options for the next step. At this point both your mesh and rig are still selected and can stay selected for the next steps.
4. We're doing Fitted Mesh, so press the plus sign by "Deform (Fitted)..." to open the panel where the Fitted button should be the one enabled.
5. The deform panel has been updated to try and make it as simple as possible. First we want to change Weight to Swap. This will swap the weights from the mBones (SL) weights to the corresponding cBones (volume/collision). If you want your mesh to also have weights place on the cBones for which there are not corresponding mBones, checkmark the Generate Weights button.
Now, here's the important part: If you want to have the mBone groups to weight to, you will ALSO checkmark "Keep groups". The mBone groups will be empty. You will have them though if you want to weight to any of them. You can delete any (in the vertex groups list) you don't use.
Apply configuration.
6. The mesh is now ready for you to test with sliders. Go to the object properties to test the sliders.
7. Go to Show bones in the Avastar tab and enable weight. This will make the sl base (blue) and volume bones (orange octahedrons) visible and put you in the weight room.
8. Enabling Stick will make the SL base bones easier to work with.
9. Use the SL bones to pose, and the volume cbones to weight.
10. To update the weights while you're painting, press alt-q to see changes to the mesh after you paint weight.
▀▀▀▀▀▀▀▀▀▀▀▀▀▀▀▀▀▀▀▀▀▀▀▀▀▀▀▀▀▀▀▀▀▀▀▀▀
There are other presets in the list. Hovering over each preset in the list will tell you what it does. If you have questions about these other presets, you can ask and I will try to explain or find out the workflow for them.
Happy Meshing,
~ele
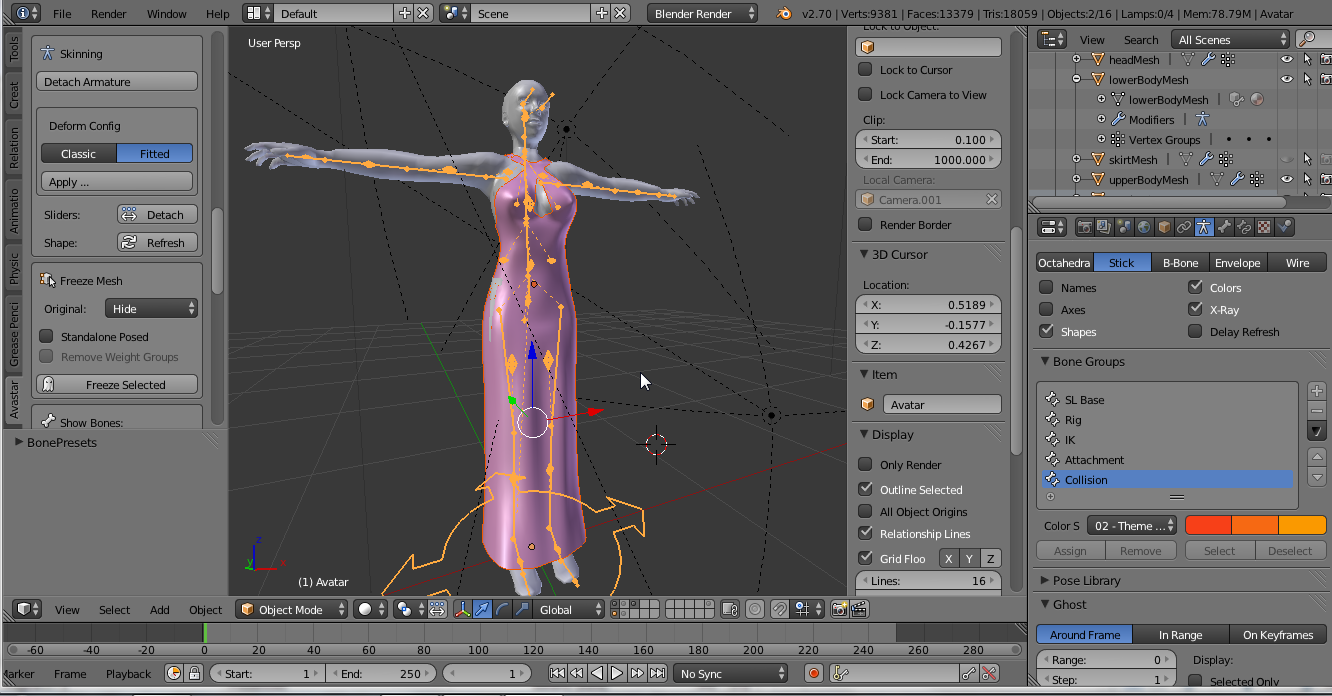
These pictures by Eleanora Newell explain a lot. This is the case, as I asked , to have both mbones and fit bones


Avastar 1039 - fit mesh


Saturday, March 29, 2014
Avastar 1038
Trying to add some cloth and collision. The lower part of the default avastar avi cannot be selected in object mode, not does the upper part. If you select it from the panel on the right, you can obtain an edit and select, not select obj mode.
 Selecting an appended workbench works
 Selecting lower body mesh works as well, as I can move it, but it is not highlighted
Friday, March 28, 2014


Trying to solve the problem with buoyancy and fitted mesh
Avastar 10.1038
New bug


more on the waist


Thursday, March 27, 2014
Avastar workflow for version 1038
this is the workflow posted with the permission of Eleanora Newell, for Avastar test 10.38.
Even if Blender says it is properly installed, if you see something wrong I suggest that you uninstall and install it again from scratch. New versions are coming out, so this will probably work just for this version
▀▀ ▀ ▀ ▀ ▀ ▀ ▀ ▀ ▀ ▀ ▀▀▀▀▀▀▀▀▀▀▀▀
Even if Blender says it is properly installed, if you see something wrong I suggest that you uninstall and install it again from scratch. New versions are coming out, so this will probably work just for this version
▀▀ ▀ ▀ ▀ ▀ ▀ ▀ ▀ ▀ ▀ ▀▀▀▀▀▀▀▀▀▀▀▀
▀▀▀▀▀▀▀▀▀▀▀▀ ▀
▀ ▀ ▀ ▀ ▀ ▀ ▀ ▀ ▀▀▀▀▀▀▀▀▀▀▀▀
Installation of Avastar test version
1-1-1038.
We have found that you will need to:
1. Install the zip addon.
2. In the addon tab, type Avastar into
the search field.
3. Verify that Avastar is enabled.
4. Save user settings.
5. Restart Blender.
6. If you are in Blender 2.7x, the Add
menu is now at
the bottom of the 3D View window. The
shortcut is
Shift-A.
If it is stubborn, uninstall Avastar
and restart Blender
before proceeding with the steps..
Still stubborn, Set to Factory setting,
uninstall Avastar
and proceed with the steps.
▀▀▀▀▀▀▀▀▀▀▀▀▀▀▀▀▀▀▀▀▀▀▀▀▀▀▀▀▀▀▀▀▀▀▀▀▀
Please note that this is for Avastar
test version 1-1-1038
and is likely to change with future
updates!
▀▀▀▀▀▀▀▀▀▀▀▀▀▀▀▀▀▀▀▀▀▀▀▀▀▀▀▀▀▀▀▀▀▀▀▀▀
● Workflow for previously weighted
mesh:
1. Have your mesh and the avastar
figure and rig ready (I like the meshes and rig on different layers
for ease of selection, you can use shift select to add more than one
layer, but you can put them as you like).
✱ NOTE: It is important to model
over the default shape. Once the model is complete and parented to
the rig, with sliders attached, you can load the shape you wanted to
use. If you did the five standard sizes, hopefully you also included
default. If not, take the one closest to default size and edit it to
the default shape. ✱
2. Select your mesh and the rig. In
the Skinning and Rigging panel, set Weight to "Keep".
Shape sliders should be on by default.
3. Press the Assign Armature button.
This changes the options for the next step. At this point both your
mesh and rig are still selected and can stay selected for the next
steps.
4. For Fitted Mesh, press the plus
sign by "Deform (Fitted)..." to open the panel where the
Fitted button should be the one enabled.
5. The deform panel has been updated
to try and make it as simple as possible. Since we are doing a
garment that was previously weighted, change Weight to Move. This
will move the weights that were originally mBones (SL) weights and
moves them to the corresponding cBones (volume/collision). If you
want your mesh to also have weights place on the cBones for which
there are not corresponding mBones, checkmark the Generate Weights
button. Apply configuration.
6. The mesh is now ready for you to
test with sliders. Go to the object properties to test the sliders.
7. Go to Show bones in the Avastar tab
and enable weight. This will make the sl base (blue) and volume
bones (orange octahedrons) visible and put you in the weight room.
8. Enabling Stick will make the SL
base bones easier to work with.
9. Use the SL bones to pose, and the
volume cbones to weight.
10. To update the weights while you're
painting, press alt-q to see changes to the mesh after you paint
weight.
▀▀▀▀▀▀▀▀▀▀▀▀▀▀▀▀▀▀▀▀▀▀▀▀▀▀▀▀▀▀▀▀▀▀▀▀▀
● For unweighted mesh:
1. Have your mesh and the avastar
figure and rig ready (I like the meshes and rig on different layers
for ease of selection, you can use shift select to add more than one
layer, but you can put them as you like).
NOTE: It is important to model over
the default shape. Once the model is complete and parented to the
rig, with sliders attached, you can load the shape you wanted to use.
If you did the five standard sizes, hopefully you also included
default. If not, take the one closest to default size and edit it to
the default shape.
2. Select your mesh and the rig. In
the Skinning and Rigging panel, set Weight to Meshes, Bones or Empty,
depending on what you want weight from. Remember that to use Meshes
means you must have the avastar, or another mesh with weights,
visible for the copying to occur. Shape sliders should be on by
default.
3. Press the Assign Armature button.
This changes the options for the next step. At this point both your
mesh and rig are still selected and can stay selected for the next
steps.
4. For Fitted Mesh, press the plus
sign by "Deform (Fitted)..." to open the panel where the
Fitted button should be the one enabled.
5. The deform panel has been updated
to try and make it as simple as possible. Since we are doing a
garment that was previously weighted, change Weight to Move. This
will move the weights that were originally mBones (SL) weights and
moves them to the corresponding cBones (volume/collision). If you
want your mesh to also have weights place on the cBones for which
there are not corresponding mBones, checkmark the Generate Weights
button. Apply configuration.
6. The mesh is now ready for you to
test with sliders. Go to the object properties to test the sliders.
7. Go to Show bones in the Avastar tab
and enable weight. This will make the sl base (blue) and volume
bones (orange octahedrons) visible and put you in the weight room.
8. Enabling Stick will make the SL
base bones easier to work with.
9. Use the SL bones to pose, and the
volume cbones to weight.
10. To update the weights while you're
painting, press alt-q to see changes to the mesh after you paint
weight.
▀▀▀▀▀▀▀▀▀▀▀▀▀▀▀▀▀▀▀▀▀▀▀▀▀▀▀▀▀▀▀▀▀▀▀▀▀
There are other presets in the list.
Hovering over each preset in the list will tell you what it does. If
you have questions about these other presets, you can ask and I will
try to explain or find out the workflow for them.
Happy Meshing,
~ele
Wednesday, March 26, 2014
strange weights in avastar

Avastar 1.1.1038 fitted mesh
Here we are with the latest test version of Avastar.
Fitted mesh does not work at all for me.
Eleanora Newell kindly sent a note with workflow, here is what should happen:


Fitted mesh does not work at all for me.
Eleanora Newell kindly sent a note with workflow, here is what should happen:
"4. For Fitted Mesh, press the plus
sign by "Deform (Fitted)..." to open the panel where the
Fitted button should be the one enabled.
5. If you have done weights from
meshes or bones, change Weight to Move. This will move the weights
that were originally mBones (SL) weights and moves them to the
corresponding cBones (volume/collision). Apply configuration."
Weight to move does not show up, nor does the menu with bones. Frustrating.
Ok , now I know what a "stubborn install" in Blender is. To solve this problem you need to reinstall Avastar from scratch.
Anyway one previous Avastar ( can't remember which one, 24 perhaps? ) worked with fitted mesh, as you can see here below)
I was still wearing something below not to appear naked to someone without an updated viewer.
Sunday, March 23, 2014
fitted mesh in SL
So after working for some days I came to some conclusions: I have not found a solution to weighting proper both for enlarged breasts and buoyancy, as they need a different system of weights to go from small to big ones or from "low" and "up" breasts.
Avastar works properly , even if it gives me messages of error.
If you haven't a mirror mesh it is not possible to use X mirror in weights , meaning the dress of the picture below is not properly mirrored because of the scarf on the neck , as I removed the faces below.
 Here you can see the model in the beta grid ( different r and l shoe, yes, I did not mind changing them). It works properly. It is more or less what you see in Avastar , but not exactly.
Below same sl official browser, normal grid
 The shape was slightly different, but the dress behaved anyway in a different way, not following the breast enlargment as it did before. True I also fiddled with mchest and other bones as fitted bones seemed not to be precise for the back of the dress, no way to paint a proper alpha.Same on the hips, they look ok in Avastar, do not in sl as the avi comes out. Or maybe I was so busy I forgot to press alt Q ( remember, the important keyboard shortcut to update when you are weighting). Will keep you posted about that. Blender crashed when I tried to save and close the program.
Then I tried in Phoenix, as I wanted to take a proper picture, but I have not updated to the latest, and I am not sure it can see fitted mesh, so this is the result
 Which means that if you buy a fitted mesh dress you run the risk to be seen this way by those who do not have the latest or official browser. The latest Phoenix with fitted mesh is out
http://wiki.phoenixviewer.com/firestorm_release_4.6.1.40478_change_log
but I have not installed it yet.
Imagine going to dance or to a concert where people can still have old browsers.
There is also a strange glitch in the dress I made, which is properly uploaded as a usual mesh, but if I texture it with a png look what happens if I rezz it :
 The mesh is the same, png in blue textured, worn, and looks normal, same texture colored in pink, and no texture on the left. If you use a jpg no problems , it looks ok even rezzed.
Any feedback is welcome
So here is what happens in Avastar
 As you can see , the problem is about the same, so I tried all possible bones as below


butt is not enough

so I tried with mpelvis, same result
 pelvis
 upper leg did something, did not dare to see what happens if you sit down
 lower back seems to be what disturbed. It can be noticed there is a line on the waist, like in sl avi, not sure why
Avastar works properly , even if it gives me messages of error.
If you haven't a mirror mesh it is not possible to use X mirror in weights , meaning the dress of the picture below is not properly mirrored because of the scarf on the neck , as I removed the faces below.
Below same sl official browser, normal grid
Then I tried in Phoenix, as I wanted to take a proper picture, but I have not updated to the latest, and I am not sure it can see fitted mesh, so this is the result
http://wiki.phoenixviewer.com/firestorm_release_4.6.1.40478_change_log
but I have not installed it yet.
Imagine going to dance or to a concert where people can still have old browsers.
There is also a strange glitch in the dress I made, which is properly uploaded as a usual mesh, but if I texture it with a png look what happens if I rezz it :
Any feedback is welcome
So here is what happens in Avastar
butt is not enough
so I tried with mpelvis, same result
Friday, March 21, 2014
working with Avastar for fitted mesh


Whatever it is, I could save the dae file and load it in the beta grid, it works. Thanks for Avastar the the work put in it!

Subscribe to:
Posts (Atom)